Ballard Art Walk at Solo Ballard Lofts 8-9-2014

  Come see the exciting Ballard Lofts at Solo, and see some of the following art pieces, Saturday, August 9, 2014 from 6-9 pm at the Solo Lofts Sales Office 2041 NW 57th St., Loft 103, 98107.  See the Solo Blog entry here.


This painting called Modifiers was the inspiration for several stainless steel and wood sculptures prepared for an six month grouping at the West Seattle Gatewood B and B at the beginning of 2014.

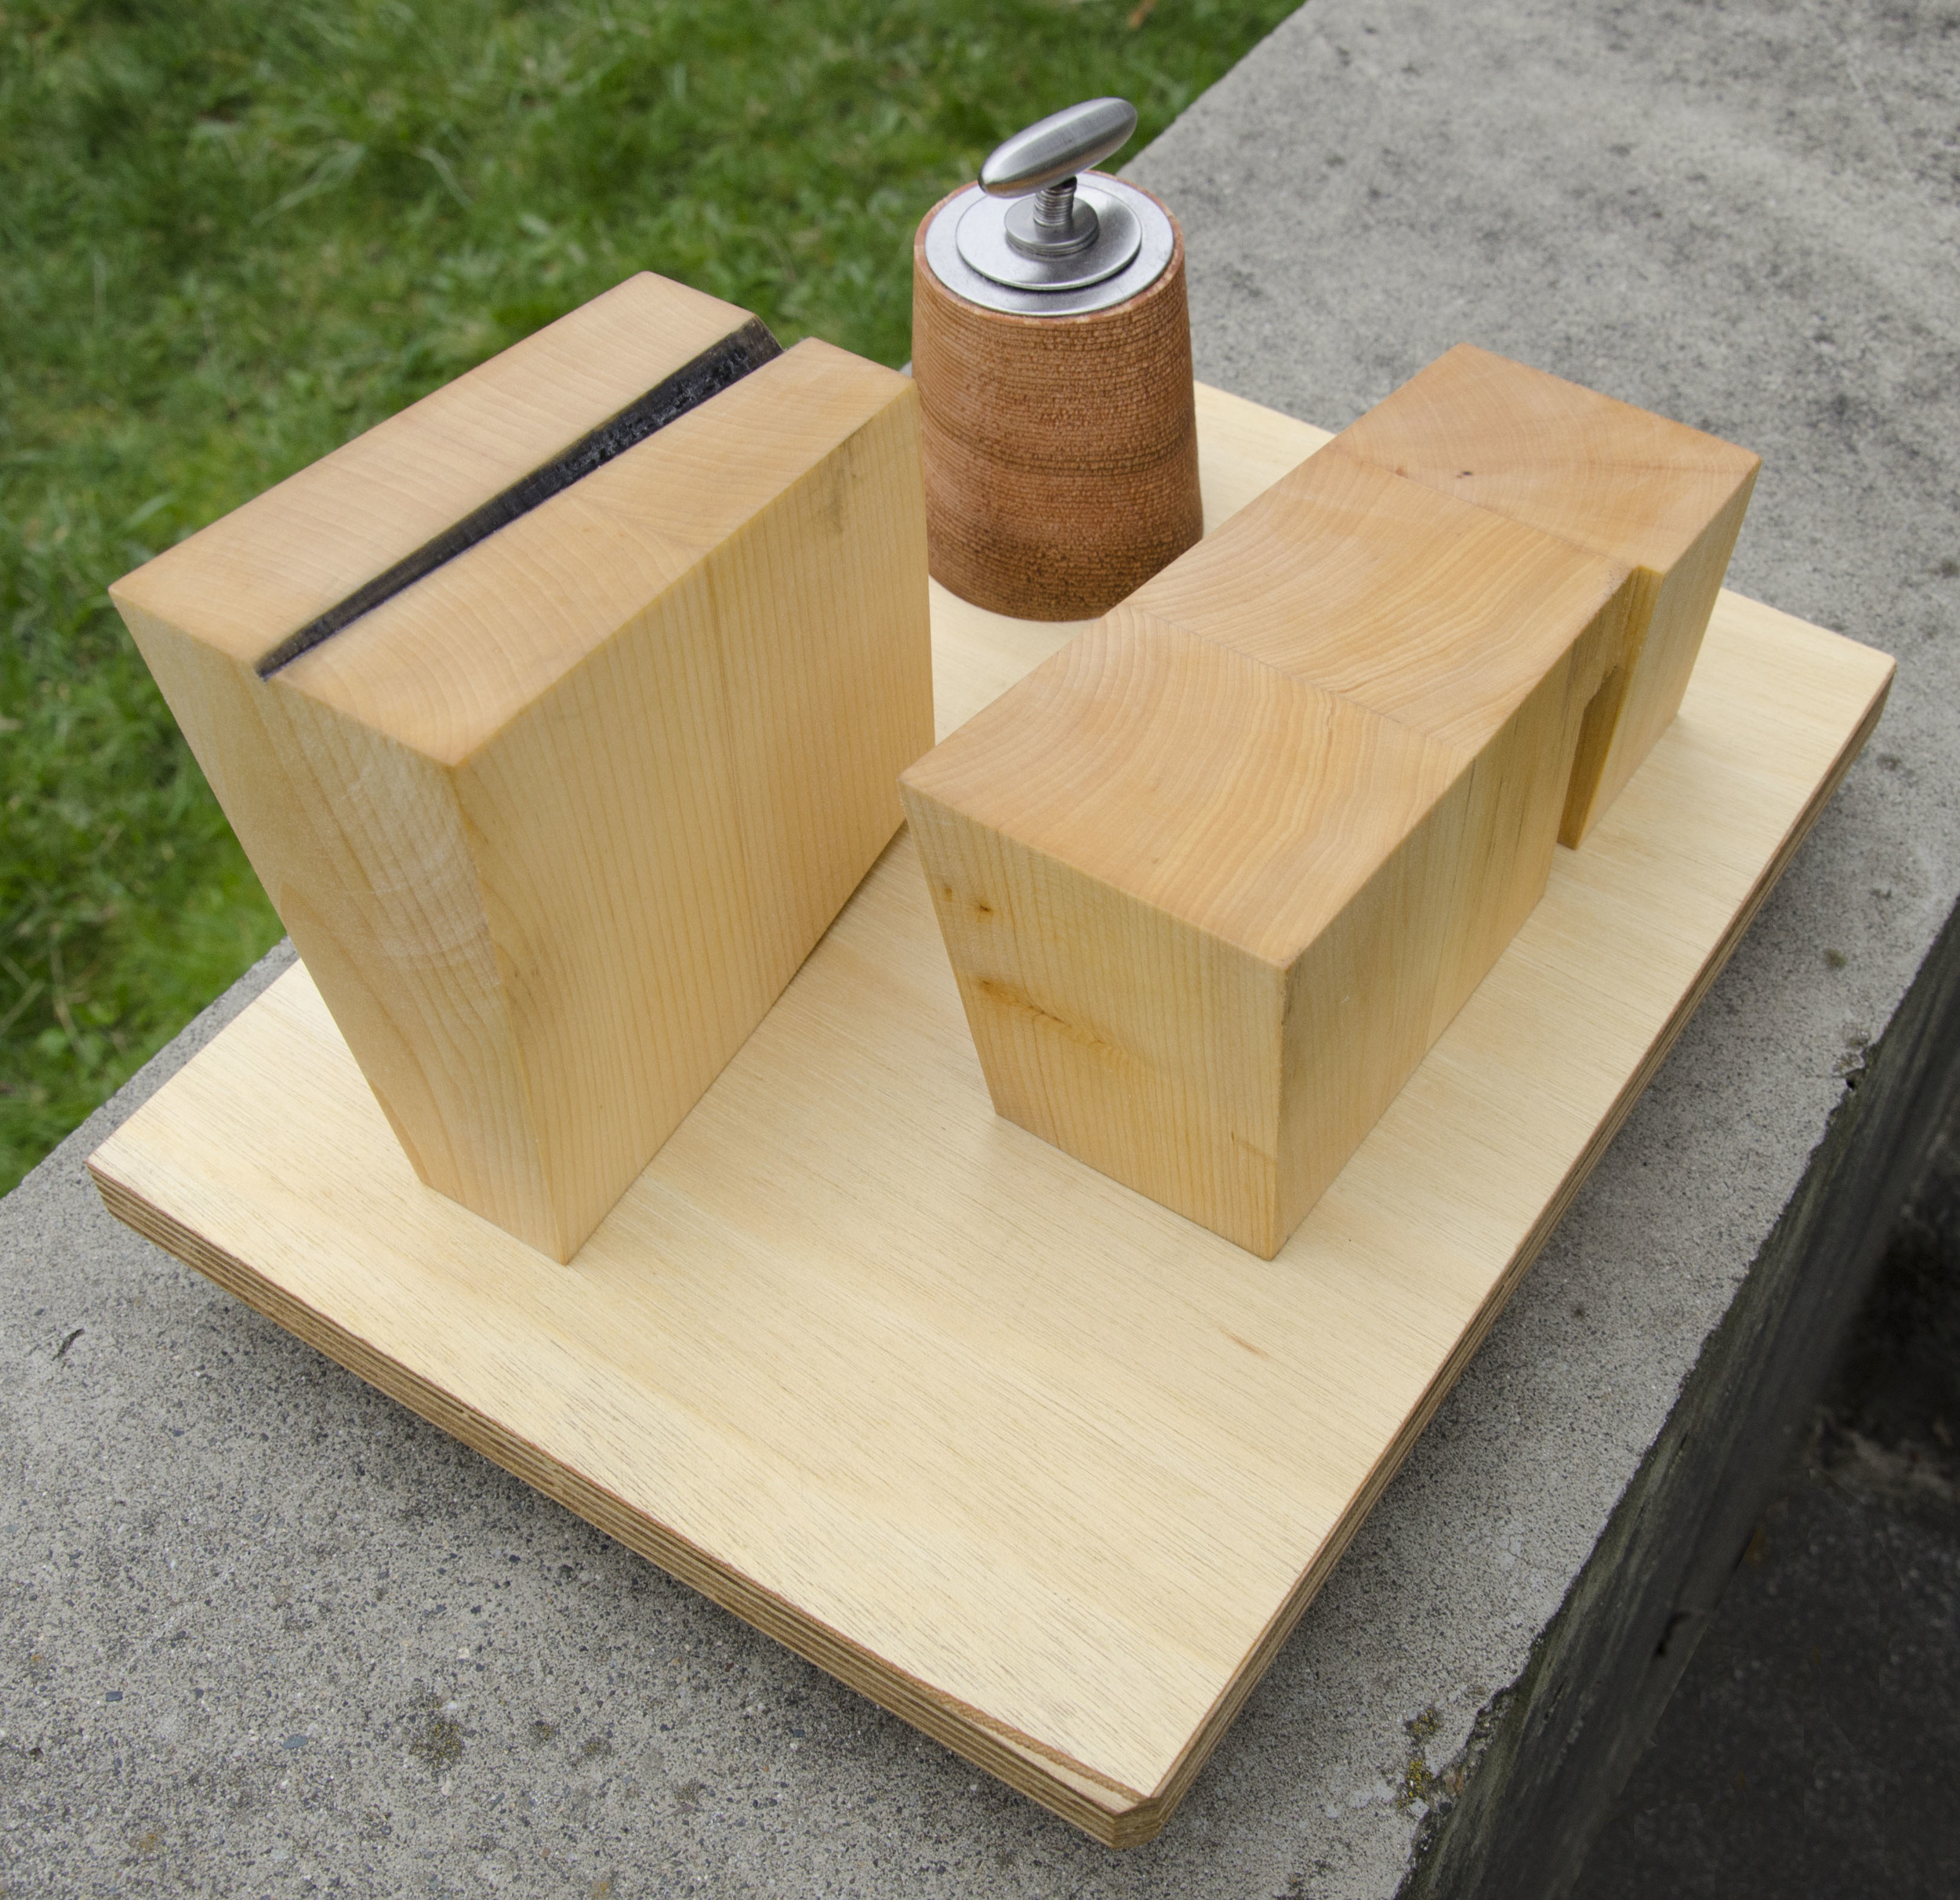
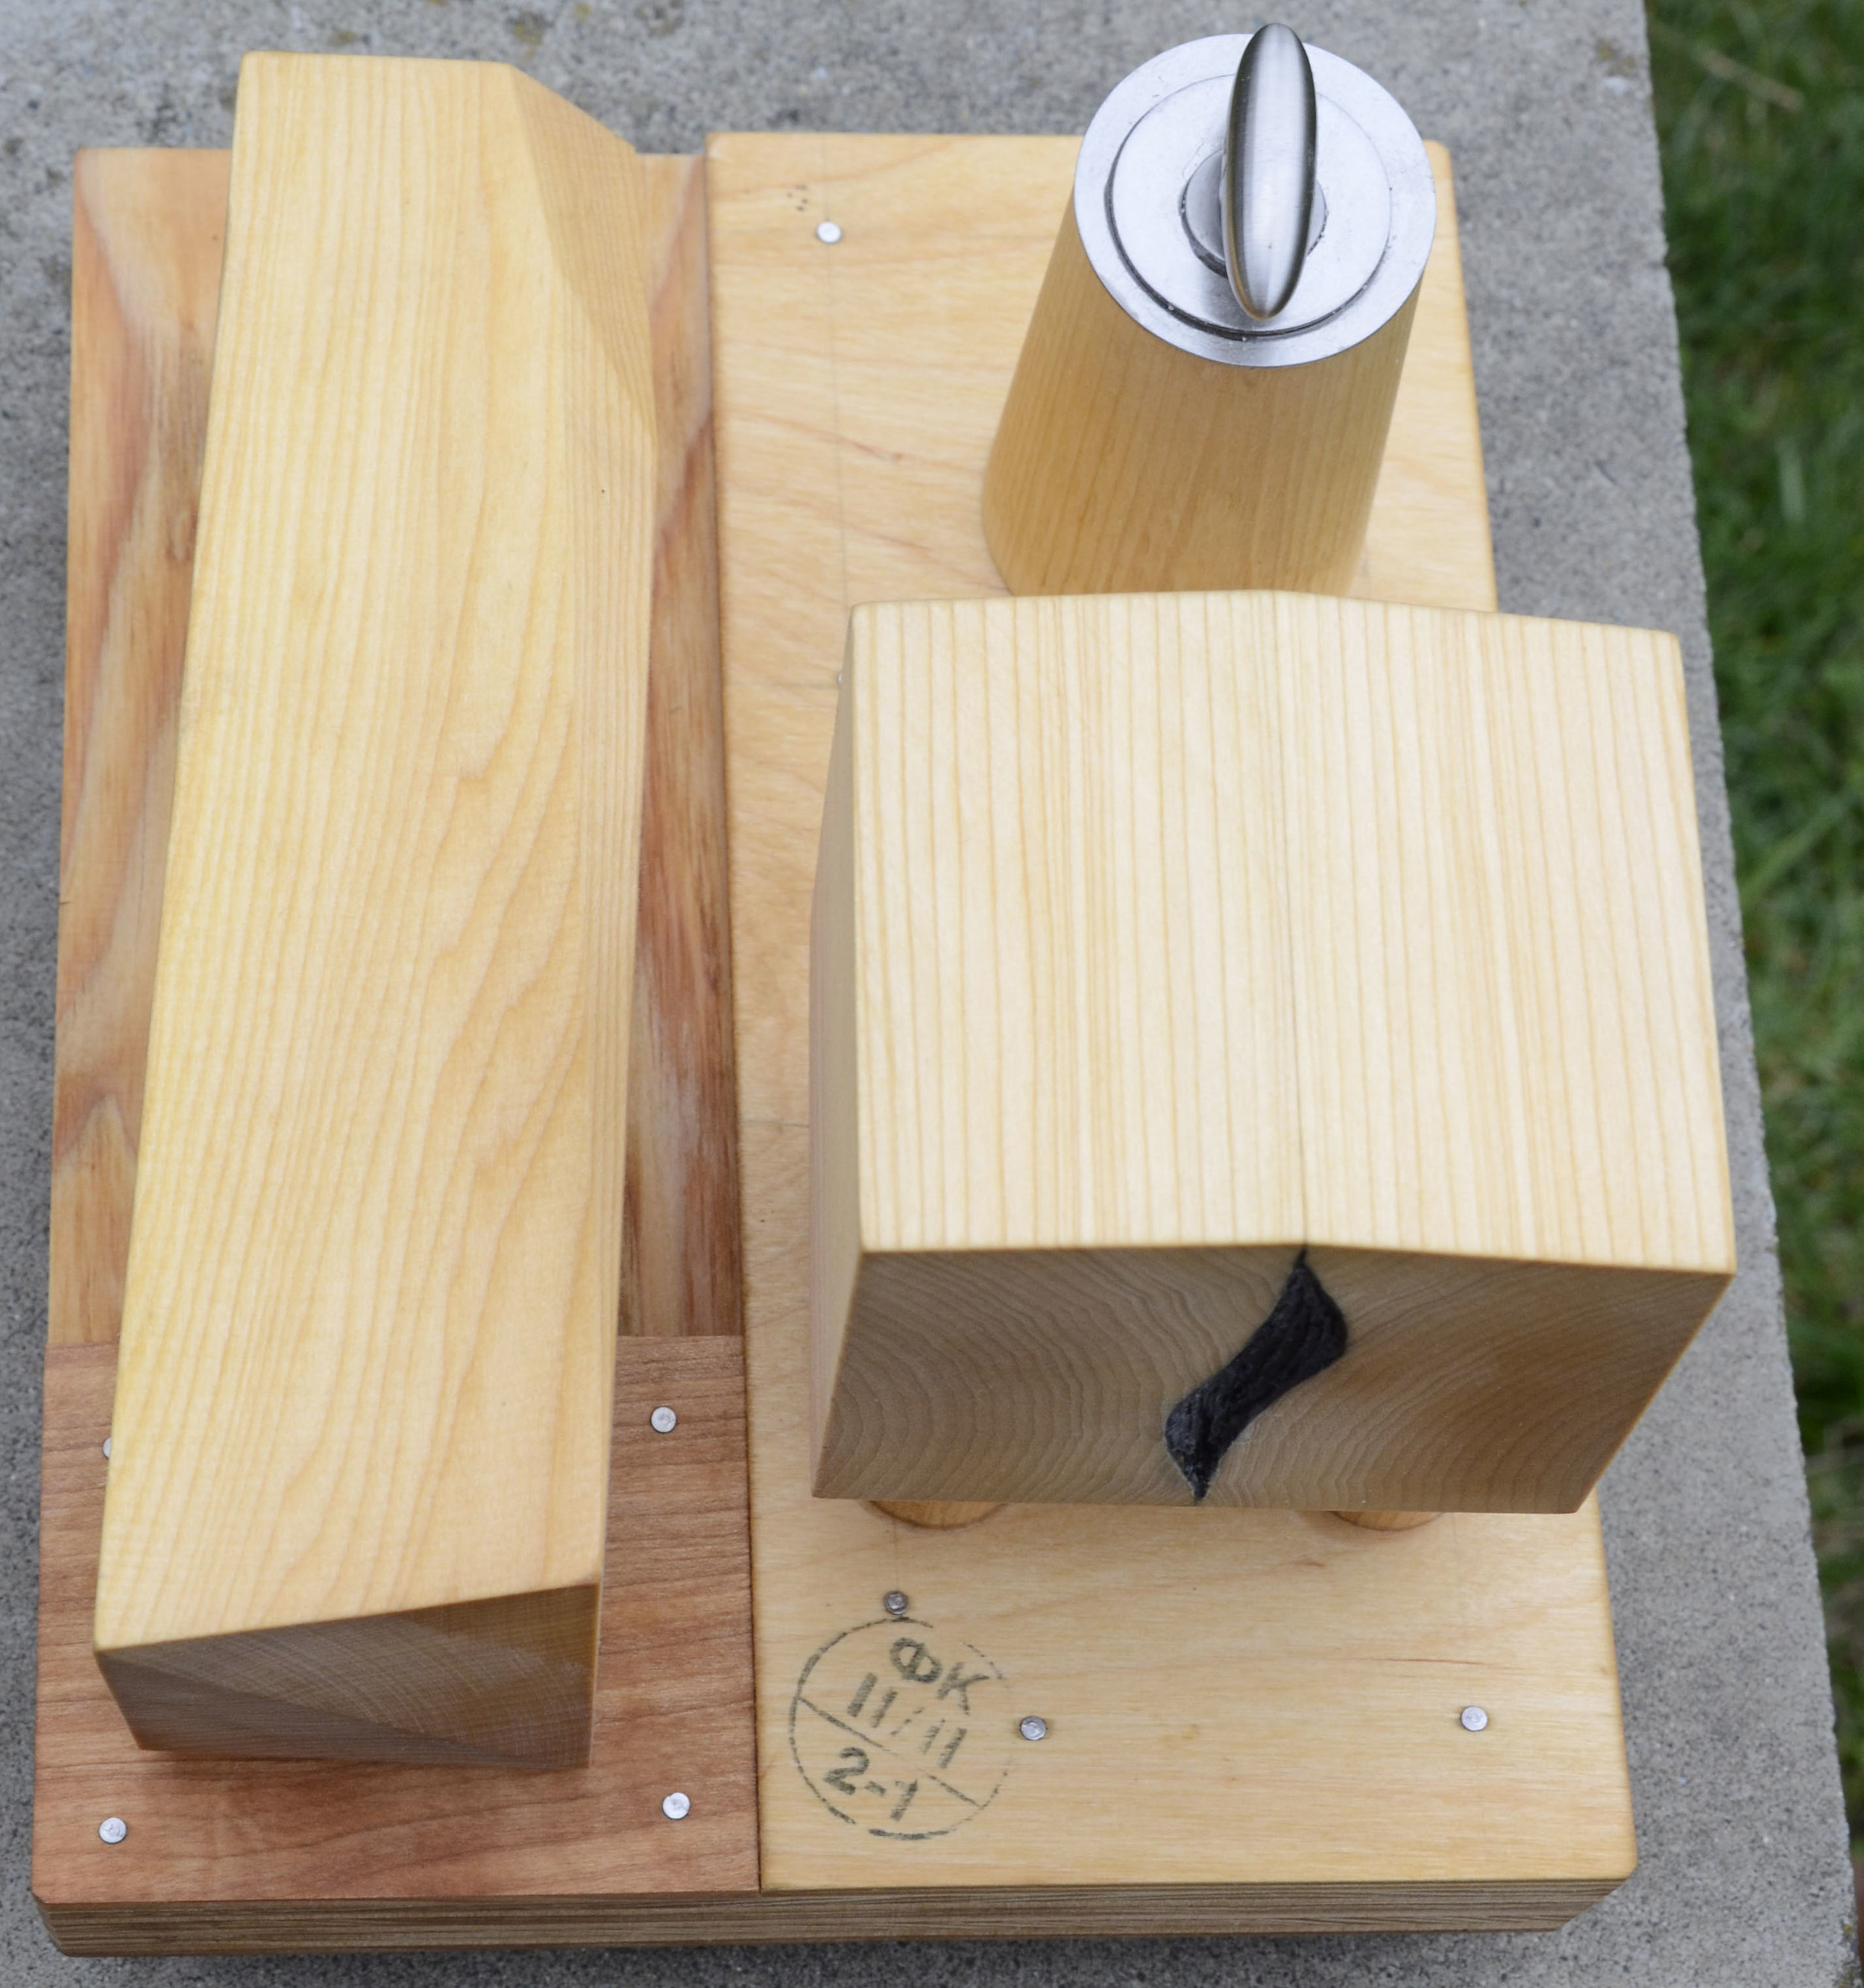
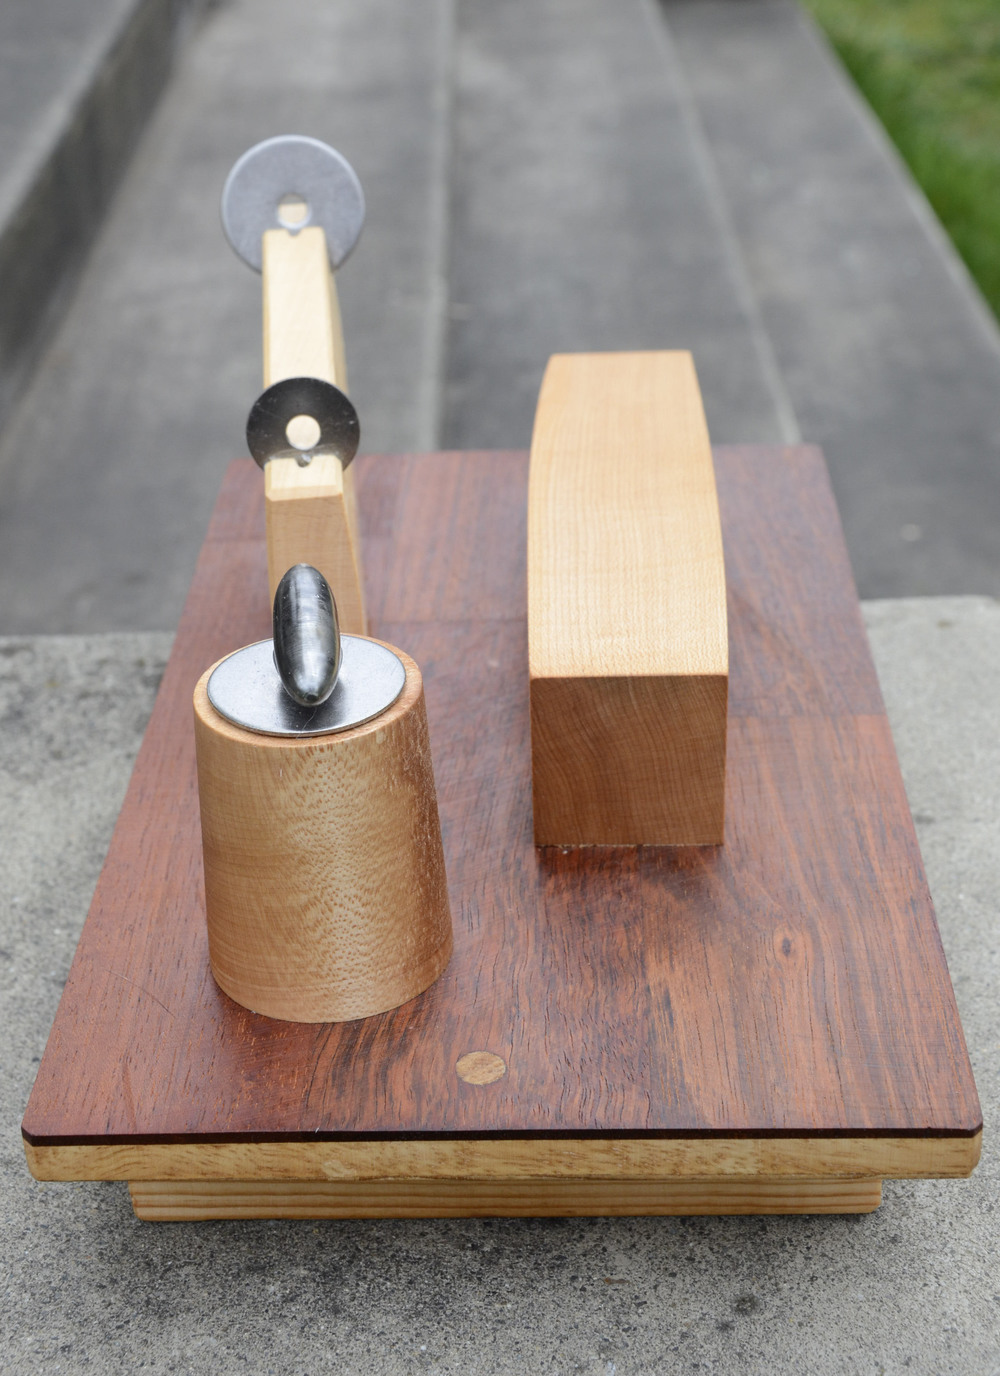
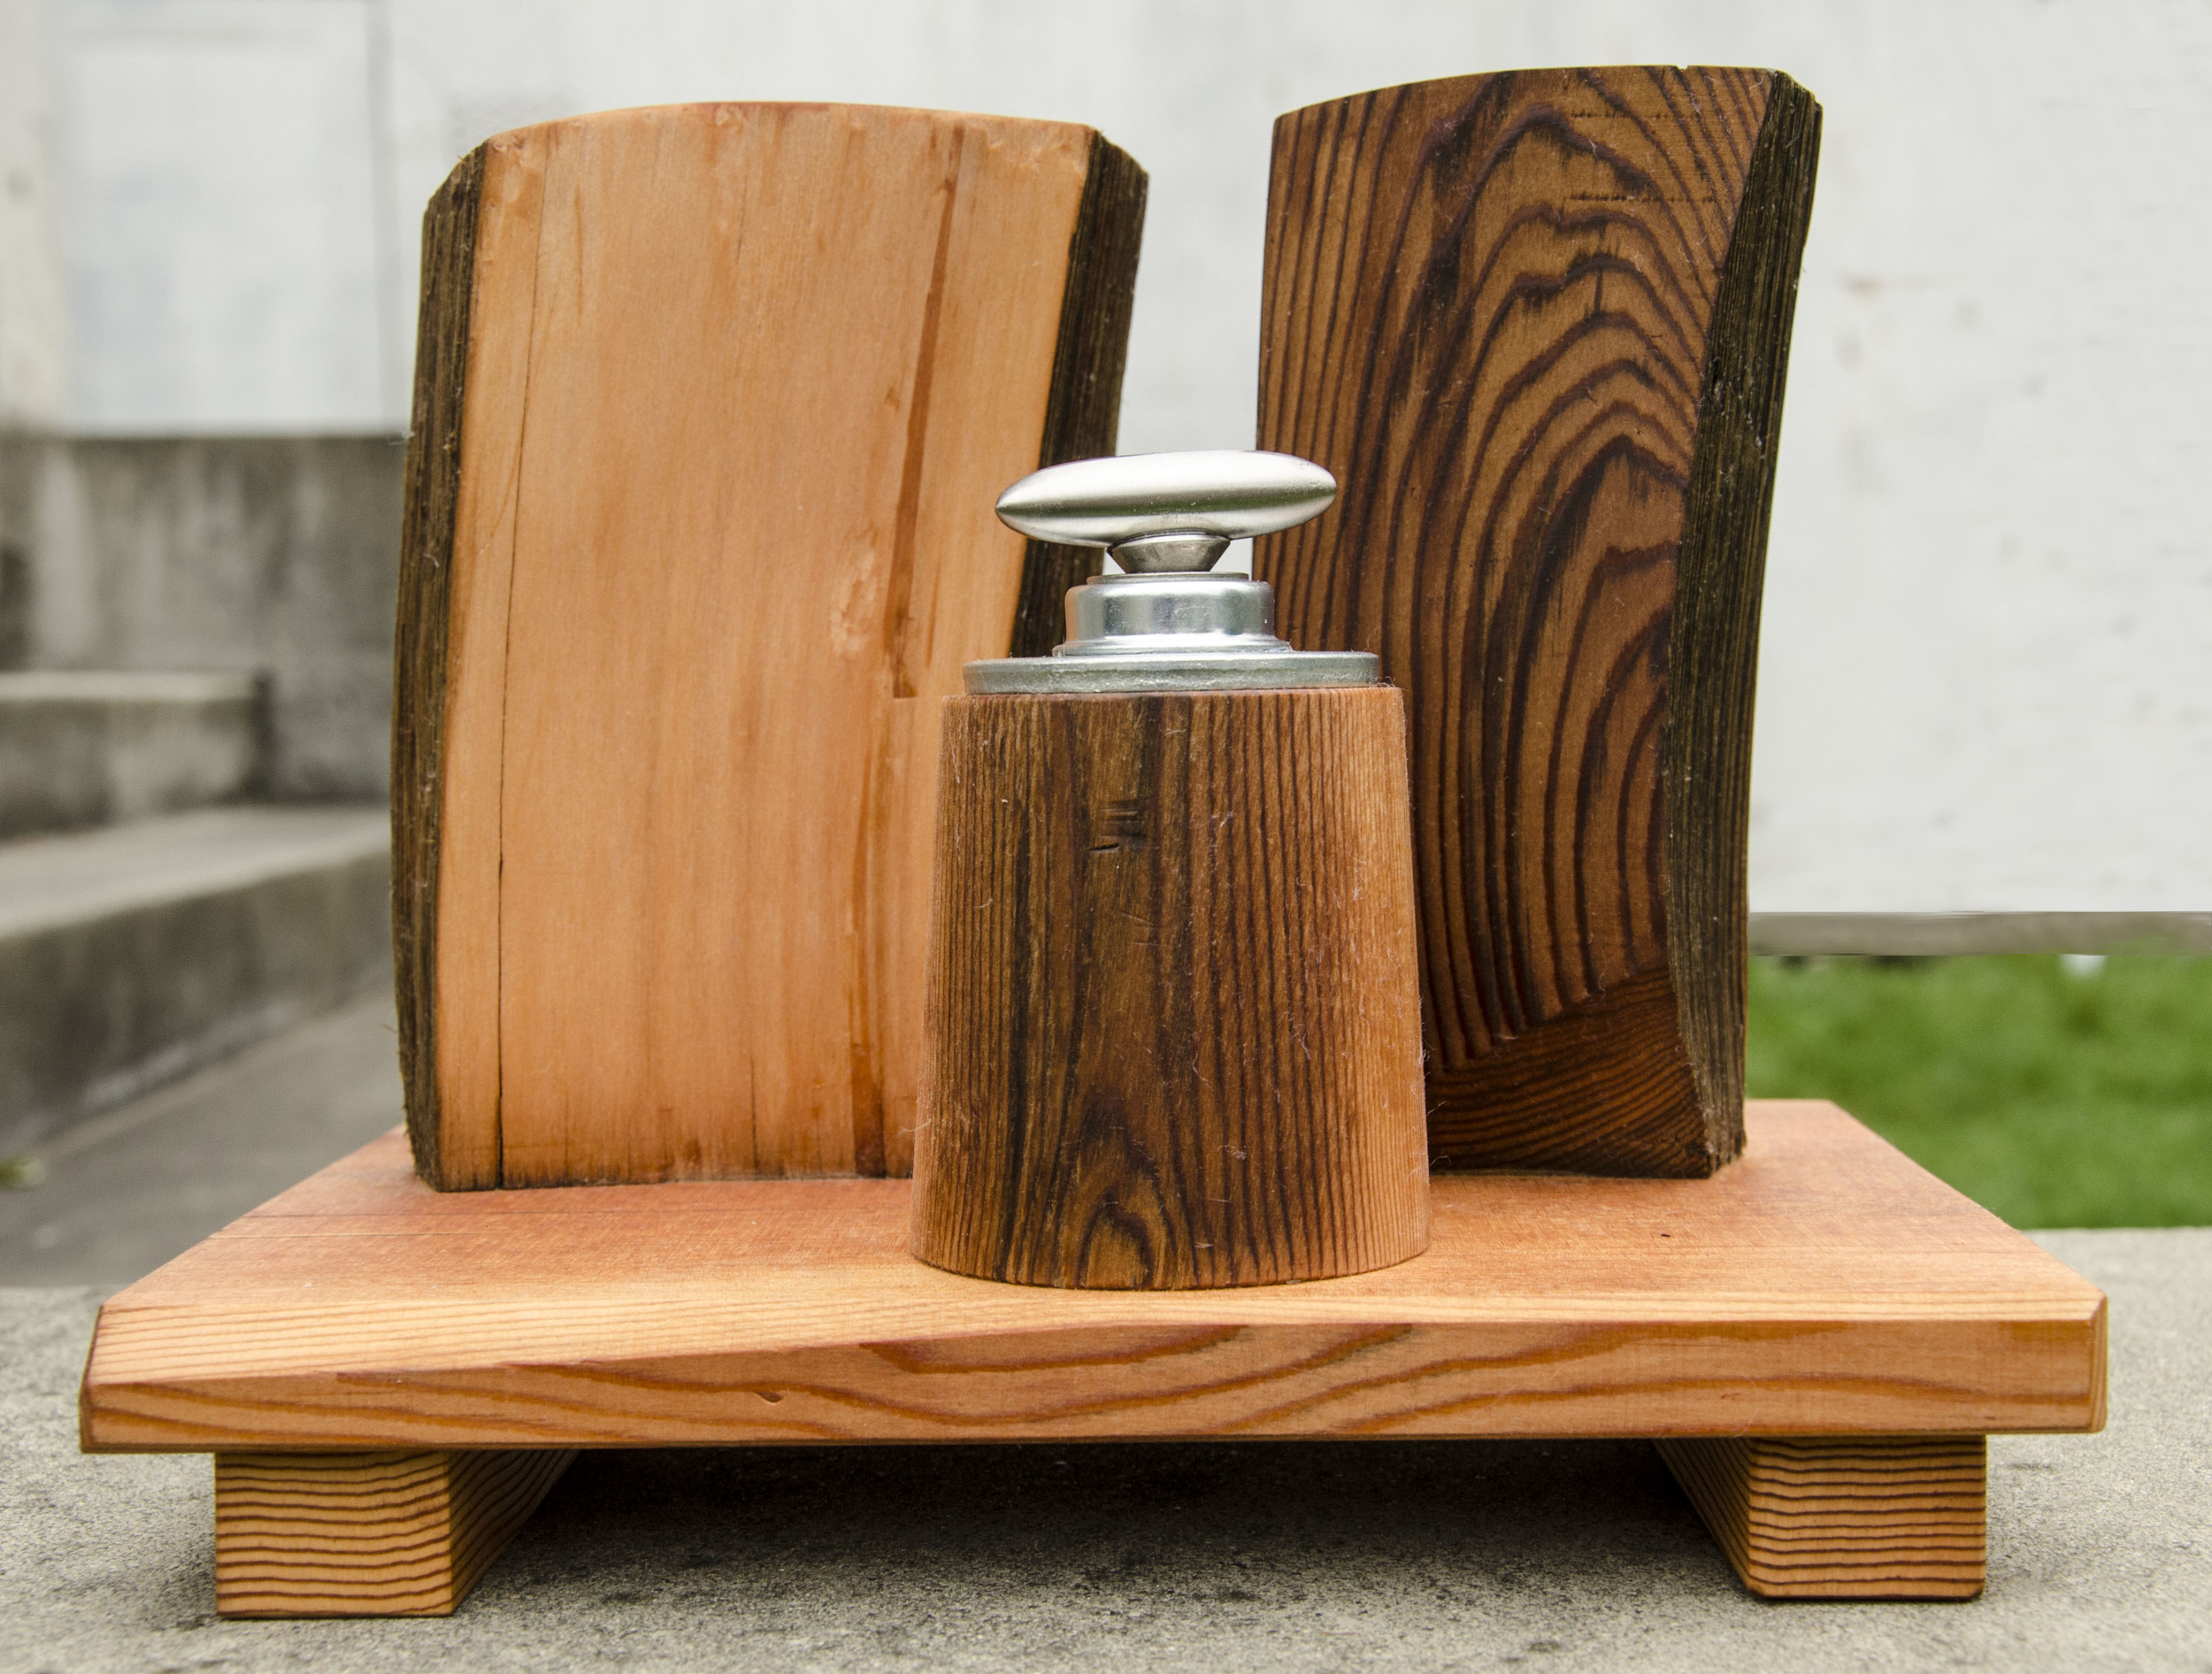
The subjects are publicly viewed and visited large utility structures imagined to purify air. They are made like nuclear cooling towers, but have some suspended lozenge that changes the molecular structure of the atmosphere for the better.

The painting is on a custom wood panel with an acrylic gesso base.  The lines are drawn and drafted with graphite and painted over many times with acrylic paint and gesso, then finished with a variety of sheens of gels.


18" x 24" Acrylic and graphite on wood panel.


The sculptures depict industrial - public - probably rural in nature and could be anything, but all have peaceful scientific roots,  with interpretive centers and docents to take groups through the facilities to have the public know where and how their tax dollars are being spent for peaceful, scientific and community enhancement.  Any of the pieces conjure a site and specific action and/or industry and often gather energy form the sky, ground or cosmic rays and refocus or disperse the energy.


Cedar Duo

Base and runners from Douglas Fir, "machine" base and "buildings" from cedar, turned on a lathe or cleaved from thick chunks of cedar scrap then glued to base. Cone shape was top drilled to take turning stainless steel lozenge , lozenge seat and roller bearing assembly were epoxied into the hole. This lozenge actually turns 360 degrees . Most wood milling is preformed by a 12 inch stationary disk sander. 7.25 x 10.125 x 8.25h inches. One of the least controversial energy/environmental advancement projects run transparently by a consortium of scientific universities around the globe.


See the Wood page for more sculptures and comments here.

Hot Glass in Steel Vessels

  These started out as an idea that the glass and steel would be annealed together and be as one, but the experts at Seattle Glassblowing said it would not work because of the incompatibility of thermal expansions of the materials. We used the steel structures as base forms and then either poured thick glass or blew shapes that could be removed.  These glass pieces were then annealed and will be joined into the steel structures.


A couple of these pieces will be on display with a couple of framed photographs of the 8x10 film factory sculpture for the

INSIDE - Art by Architects show from July 8 - August 22, 2014 at the:


AIA  Gallery AIA Seattle 1911 First Avenue Seattle, WA 98101 Tu-Fr 10-5

There will also be an opening for the show Friday July 11, 2014 from 5-7pm

http://www.aiaseattle.org/node/8909


This first image is showing final piece to be welded held with steel fingers:

steel glass welding small

This image shows the three welded vessels:

steel glass three vessels small

After molten glass is loaded into the steel vessel:


hot glass in steel small

Here is the punti being formed to pick up glass out of vessel:

punti for hot glass small

Punti pulling glass out of vessel:

punti pulling glass small

Glass set into vessels, almost done - glass will be adhered to vessels, some vessels may be partially painted:

Steel glass sculpture 2 Small 6-9-2014

Gatewood B an B Second Thursday continues

Jon Taylor at Gatewood B and B West Seattle Second Thursday Art Walk 

May 8, and June 12, 2014


Come by this Thursday between 6 and 9pm to see Jon Taylor’s paintings, acrylic resin, welded steel and wood/stainless steel sculptures.

Sara Barton has put the extra effort into the Gatewood B and B in West Seattle to invite several artists to hang their work for sale as well as graciously opening up the second and third floors to display the artwork prominently in the sky lit upper lobby and some of the rooms.

There is always a nice spread of food and a welcoming by Sarah to show off the B and B and the art on Second Thursdays.


If you want to see the art on other days and and you want me to walk you through, please call me at 206-612-9863 to set up an appointment,  or you can call Sarah at 206-938-3482 to drop by at the  Gatewood B and B to view the the art next time you are in West Seattle.


Come see this great family run B and B and enjoy the art this Second Thursday May 8, 2014 and June 12, 2014 from 6-9pm.


The Gatewood Bed and Breakfast

7446 Gatewood Rd SW
Seattle, Washington, 98136, United States
206-938-3482
Gatewood Art 2014

Wood and Stainless Steel Sculpture

These sculptures are a mix of the properties and aesthetics of the cedar, fir, basswood, cherry, maple or varieties of other woods and plywoods and how they are fastened and adhered together. The largest is 9x12x 7 inches high and the rest range down to a little bit less.  Five of them have truncated cones that have some kind of turned stainless steel lozenges custom milled by others.  The machine or apparatus of the stainless steel components and the turned wood structure could be used for energy or atmospheric modifications.  In some projects there are rumors of secretive or questionable practices by stealth government agencies and collaborations with large corporations or other countries.  Many years of driving around  Eastern Oregon, Washington and Idaho, the Willamette Valley in Oregon or near Yakima with vast expanses of land where every once in awhile is a dam in the hills, a ski resort, a power plant, bombing range or smudge pots and large blowers and recently large wind turbines. These real life observations coupled with an architectural background that included interpretive and learning centers for cultural, natural or scientific sites has led to some of the order and compositions of the sculpture.  Included in this post is a painting that also inspired this work.  These sculptures may be scanned someday and replicated in cast aluminum or bronze.  Certainly more wooden and /or metal sculptures will spring from these ideas.  Several finishes have been tried over the years to easily clean off the dust and grime. Hopefully this back to basics linseed oil and modified linseed oil will do the trick.  Some of these works will probably get a layer of spray paint or oil or acrylic paint applied before and sometimes after the oil finish. Several of these pieces will be displayed at the Gatewood B and B in West Seattle.


Multi lam plywood base with scrap wood runners below.  Cedar machine base, stainless steel washers and lozenge with hidden brazed rod epoxied into cedar, basswood buildings, carbon applied to notch cut into one building for beam rail path into space. Maybe for measuring the space/time continuum?  7 x 12 x 6.25h inches.


Thick Douglas fir plywood with Baltic birch and scrap cherry plywood to slant bottom of administration building attached with stainless steel brads and glue. All building components are basswood. Stainless steel components are epoxied to cone and wood is glued and doweled to base.  Power transfer and flux building is book-matched and glued then shaped and sanded.  Carved entry and exit portals are marked with graphite lead. Powered beams are focused and directed to the flux building then energy is shaped and dispersed to the atmosphere.  Government officials believe the atmosphere withing 100 kilometers is much healthier and has the data to prove it.  Mysterious Russian markings indicate a cooperative venture. Some skeptics believe there is an artificial subterranean exotic mineral extraction site that diverts half of the energy.  Each country dismisses this suggestion as fantasy, but can't prove massive energy losses  before modifications to the atmosphere.


Engineered flooring sample with Douglas fir runners.  Hard rock clear maple turned, shaped and sanded then assembled with hidden glued dowels between components and base. Stainless steel lozenge with hidden brazed rod and washers epoxied to cone.  Focused beam with stainless steel accelerating rings epoxied into slots of thin support building.  Advanced assembly is powerful enough to focus energy transfer for space station and space craft fueling over long distances.  Also used for controversial military operations with ground and space controlled satellites mounted with foucussing and aiming mirror arrays.  Activist non-government approved research shows bird populations in vicinity of beam have been drastically reduced since inception of assembly.  Unexplained commercial atmospheric flight disappearances have caused concerns, local and national government agencies are quiet about this heavily guarded project.


Thick solid one piece basswood base with Baltic birch ply machine cone lower buildings and basswood cone and greenhouse buildings glued to base. Stainless steel washers and lozenge with hidden brazed rod epoxied into cone. Machine for air quality and weather modification serving more than this one greenhouse in public owned and maintained agricultural/atmospheric district.  Public accessible property with interpretive center in machine base buildings.


Base and runners from Douglas Fir, "machine" base and "buildings" from cedar., turned on a lathe or cleaved from thick chunks of cedar scrap, glued to base. Cone shape was top drilled to take turning stainless steel lozenge , lozenge seat and roller bearing assembly epoxied into hole. This lozenge actually turns 360 degrees . Most wood milling is preformed by a 12 inch stationary disk sander. 7.25 x 10.125 x 8.25h inches. One of the least controversial energy/environmental advancement projects run transparently by a consortium of scientific universities around the globe.


18" x 24" Acrylic and graphite on wood panel.


Photography Showcase at UW Medical Center

  If you missed the Opening Night of the Photography Showcase at UW Medical Center, the show will be running through November 20th, 2013. The show highlights the work from the year-long University of Washington’s Certificate for Photography program. Find out more on my Events page.


I am proud to be part of this great effort and show by my classmates!


UW Medical Center, 1959 NE Pacific Street, Seattle, WA 98195 at their Sky Gallery on the Third Floor at the Main Lobby Level from August 20th until November 20th.


Welding cart and construction

  If you buy a new piece of equipment it usually demands some additional tools and equipment.  Here is a list I personally use to make my welds safe for me and effective for the finished piece:


Specialized wire cutters to snip off the correct length of wire, a grinder and a portable metal cutting bandsaw.

Protective leather gloves, a mask for particulates and gasses, a cotton cap, a self-darkening welding helmet and a tank with carbon dioxide/argon mix shielding gas for cleaner welds.

A variety of Vise-grips, crecent wrenches, clamps, magnetic holders. There is much more, but these are the basics.


Storage for these usually requires a place for the tools and tool boxes for the smaller pieces and expendables.  For convenience a welding cart is a great way to get this family of welding equipment to a welding area and back to its storage area.

You can buy a commercial cart for all of this equipment, but I chose to take the long route and make my own.  I sized this cart to take another tank of gas for stainless steel or aluminum and an additional adjustable shelf for more tools and sized the top for room for another welder or plasma cutter.  I also used my favorite locking 4" casters from RH Brown.


[portfolio_slideshow pagerstyle=thumbs pagerpos=topfluid=true class=pager-right paperwidth=180]

8x10 camera and factory sculpture from film

  Last term at the Certificate for Photography program at University of Washington, I constructed a 4x5 box camera thinking I would make it for a pinhole, I did make it and made a shutter out of a floppy disk which you can see in previous posts. One of the projects I made from the film after making drawings for all sides of a factory was to develop the film and without enlarging it onto paper, cut the film into shapes and make an "architectural" model out of the film adhering the sides and clerestories with scotch tape.  The 4x5 factory was a bit small and an 8x10 film camera would make a bigger sculpture from it's negative, so a new camera was built, originally designed for a pinhole lens, but made flexible to take any Horseman or Sinar lens board.  The camera had set a focal length of a little over a meter and used a 210mm lens and lens board from a Horseman 4x5 view camera.  On an 8x10 camera a 210mm lens is a bit wide, so so the drawings to be photographed were enlarged  to fill the negative.  Instead of hand drawing the elevations were constructed them in Google's SketchUp drawing program, printed at 11x17 and then about doubled on an enlarging copier.  The pages were taped together to get a subject big enough to fill the image on the film.  Color corrected compact fluorescent bulbs in two studio lights with reflectors and scrims were used to flatten out the light.  After some sloppy developing (two of the negatives dislodged in the developing tank and blocked a lot of the chemicals for another two negatives, so they were faint) the negatives were dried and then cut out and made into the factory sculpture out of the film.  The sculpture was placed upstairs in the study window and shot digitally south to Lake Union, Downtown Seattle and the Space Needle.  The RAW files were manipulated in Photoshop and made a couple of great prints.


Simply stated, an economical scratch-built 8x10 camera box was built with a fixed focal length, a 210mm lens and a double sided 8x10 film holder were attached to the front and back of the camera, a set of sides were drawn electronically for factory shapes, the enlarged factory drawings were shot on film with the 8 x 10 camera, the film was chemically processed, the film was washed and dried then cut out to be joined with scotch tape, then the sculpture was digitally shot and the RAW files were manipulated in Photoshop and printed on the University's high-end Epson archival inkjet printers.


Seems so simple, doesn't it?

[portfolio_slideshow pagerstyle=thumbs pagerpos=topfluid=true class=pager-right paperwidth=180]

New sculpture tool and cart

  Taylor Art House has acquired a new tool for joining steel, a Miller 211 MIG Welder.  My neighbor down the street let me borrow his suitcase MIG welder for several months last year, gave me a hour of lessons, showed me how to set up the shielding gas, how to prepare steel for welding and then how to  "hot glue" pieces of steel.  I got so enamored with the process, I bought my own and hope to have some pieces for the PUP show at Phinney Center Gallery in April 2013. Included are photos of a SketchUp model of a welding cart, the MIG welder and cart pieces read to weld.

[portfolio_slideshow pagerstyle=thumbs=topfluid=true class=pager-right paperwidth=180]


New Shutter from floppy disk, Legos, etc.

  I cruise the Web for all sorts of cheap ways to make components for large format cameras.  I have seen several shutters for pinhole cameras made using floppy disks.  The recently built  4x5 camera needed a better shutter than the taped black piece of paper that was being used.  Shutter speeds are pretty slow for pinhole cameras, so time or vibrations are not as critical as cameras with the relatively large openings in glass lens.  This shutter was cut down with a band saw and the rough edge was sanded.  The floppy memory material was removed.   A Lego "handle" was cut in half and one piece was epoxied to the slide and the other was attached above the slide on the body of the floppy case to act as eye hooks to make a frictionless path for the waxed thread (used for finishing off ropes for sailing).  Another Lego piece (white) was drilled and had a small v cut into the drilled hole and the hole was reamed to have a round glass bead seat into the bottom to hold the slide open.  That stop was epoxied to the lower part of the floppy. Two holes were drilled to the top and bottom of the floppy case for small stainless screws and washers to hold the shutter to the lens board in case another shutter wanted to be used or this one repaired.  The tolerances on the slide are such that there is still room for the mechanism to move freely and remain light tight.  On the photos of the open mode of the shutter you can see the brass sheet with the pinhole. This was not only fun to build and cost effective, it has very little vibration and is very effective and light proof.